Looking for a way to pass the final few days of East Coast winter? Want a project to share with your loved one? Something to remind you of happier days?
Support Volunteer Judy, a world traveler and award-winning painter (see her work here), has the answer with step-by-step instructions for creating a beautiful painting.
We’d love to see what you come up with. Share your completed paintings with us on Facebook , Twitter or Instagram.
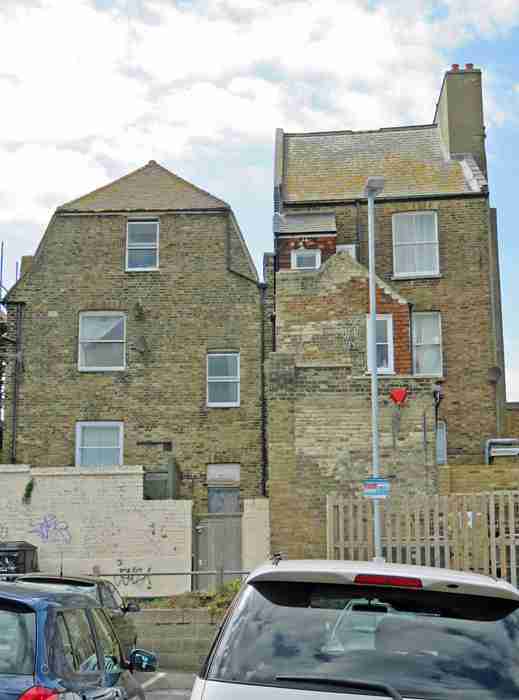
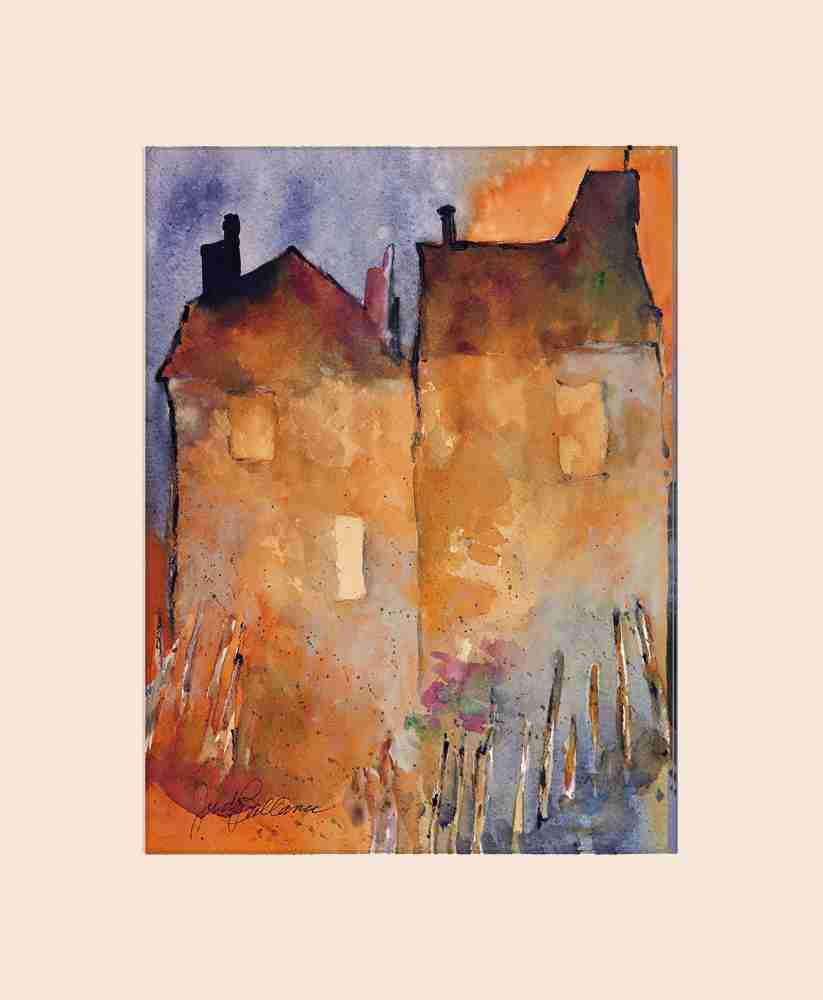
I photographed this scene when my husband and I visited Margate in England. It is the back of some houses from the parking lot. The day was beautiful and the people delightful.
My goal as I painted was to show the warmth and joy of the day.
My Palette (left). I only used a few of the colors you see here. Tools used in creating the painting (right). They are, from left to right, a 1 ½ inch (flat) squirrel mop, a bamboo reed pen, a #8 round sable, and a #4 synthetic rigger.
I have left out the cars and put in a fence, I think the fence is much more interesting and tells a better story.
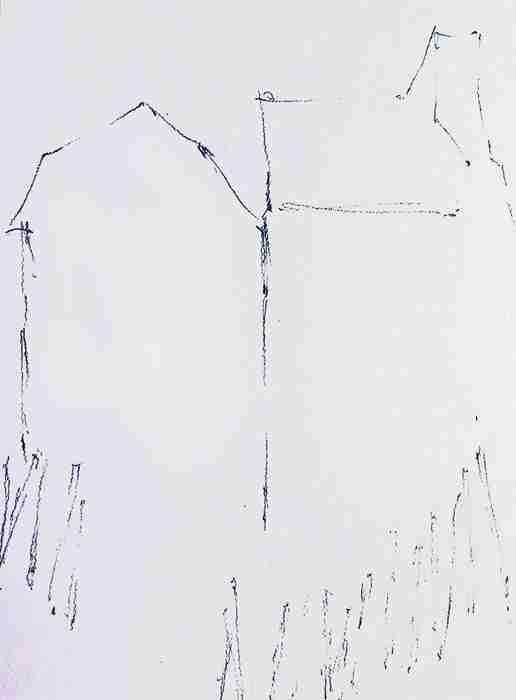
Note: I drew this darker than I normally would so it could be more easily seen here.
I love the many chimneys of England, they make such interesting skylines. I added an additional chimney in my painting to create more interest.
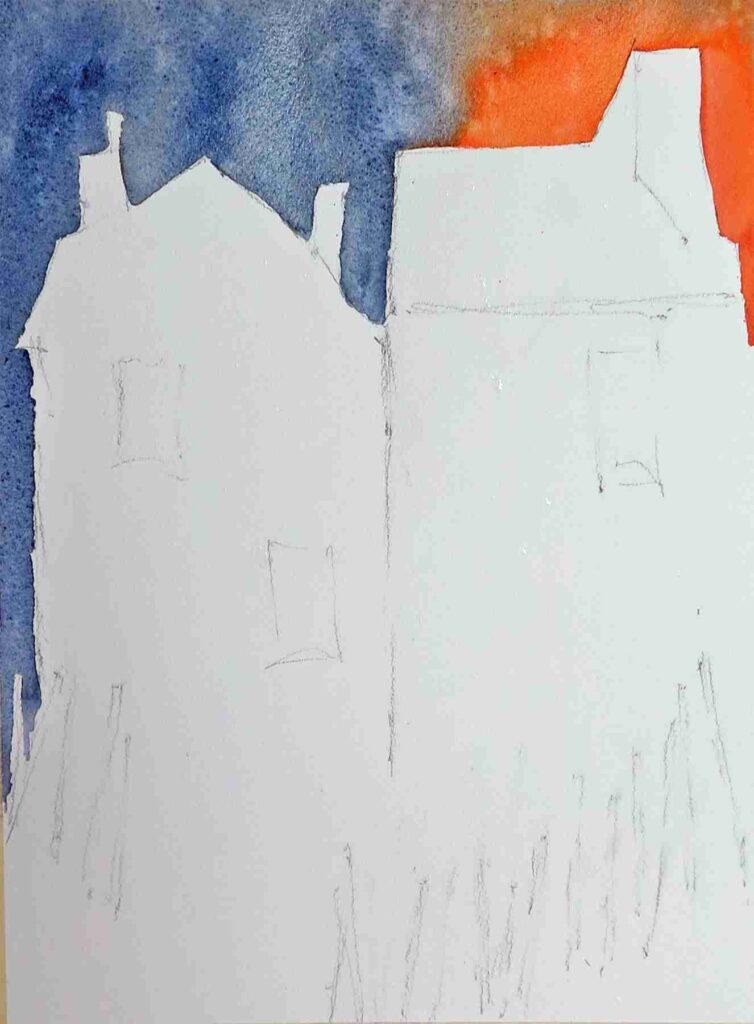
I began by painting in the sky area with contrasting warm and cool colors to create dominance, rather than the value dominance used by most painters. Then while it was still slightly wet, I spritzed it with a few drops of water to add texture and visual interest.
The hues used are Paynes Gray (cool) and Halloween Orange (warm). The only brush I have used at this point is the 1 ½” flat mop.
I used a hair dryer to dry the sky and began on the buildings. I’m still contrasting warm and cool colors for dominance. I have added Gold Ochre (warm) to the Paynes Gray (cool) and Halloween Orange (warm) and, am still using the flat mop brush. Creative painters don’t copy a photograph, but use it for reference only. Their work will describes their feelings about the scene and allows their audience to come up with their own emotions based on their experiences.
I now have Paynes Gray and Halloween Orange in the background and in the foreground, creating unity and rhythm in the painting.
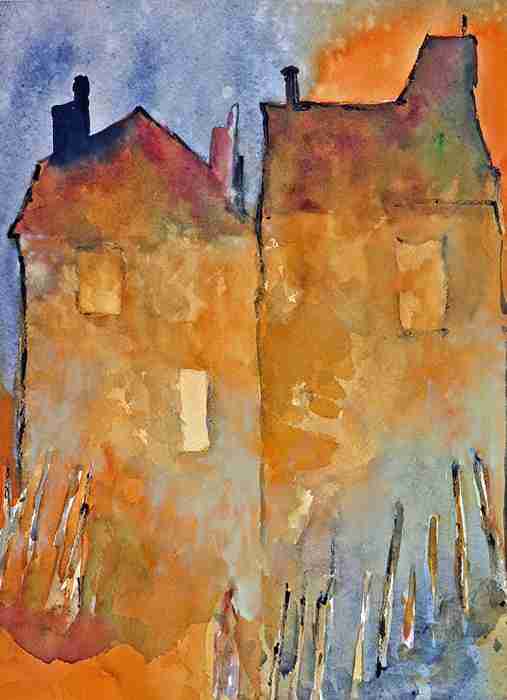
Now I begin to add a little texture to the walls of the buildings, using Burnt Umber (warm) and the side of the #8 round brush.

My next step was to begin working on the roofs of the buildings. This will be my area of highest value contrast, but I still want it to be subordinate to the warm and cool colors which I want to be dominant.
You can’t see the Quinacridone Violet (warm) and Hookers Green (cool) colors I have added in the roof area, I couldn’t get them to show up, even when I used Photoshop. They can, however, be seen in the next photo. I used the reed pen to outline the roofline in burnt umber.

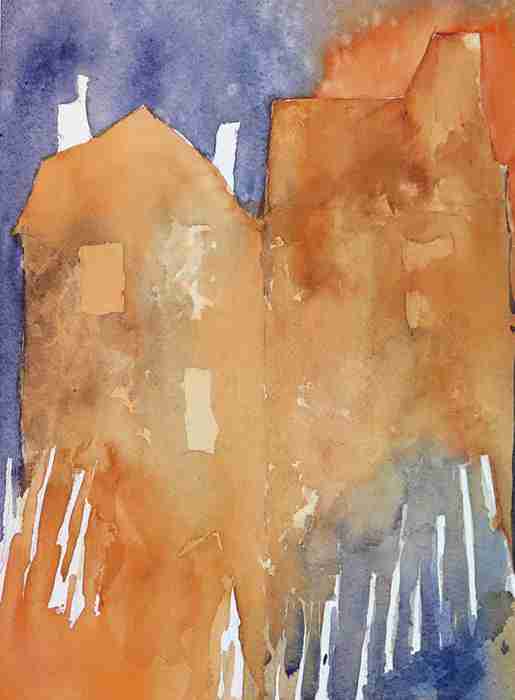
In this shot, I have begun to bring out the fence posts.
I notice a light shape beside the top window on the left building. The two shapes side by side make the building look like it has eyes, I’ll have to fix that. You can see a little mauve and green in the roof here.
Here, I add some Coastal Fog (a cool opaque) and correct the window problem on the left building. Both done with the side of the #8 round brush.

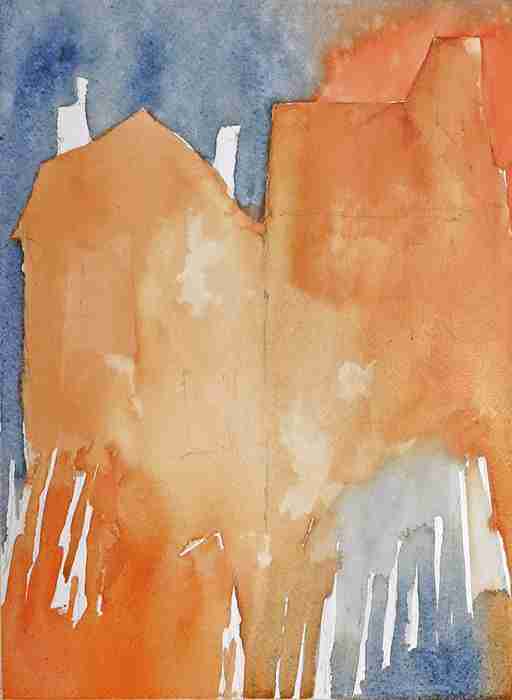
I have added Quinacridone Violet (warm) and Hookers Green (cool) to the fence area, creating the illusion of wild flowers. The purpose is to bring my viewer’s eye around and through the painting. I load the rigger (the thin pointed brush) with dark paint and tap it against my other hand to create a spatter of dots for texture.
The Finished Product!