Welcome back!!! The Gala is just around the corner (Saturday, November 4), and we have a quilt to finish!!!

Just wanted everyone to say hello to my trusted sewing machine, my quilt rings, and the army of pink/white thread having a “board meeting” to regroup.
First thing’s first: what does the “quilting” process mean? It means this:

As I explained in my last post, there are three layers of a quilt: the top (with your beautiful design), the batting (center) and the “backsheet” (bottom) (remember in my last post I referred to a quilt as a “sandwich”). Something needs to secure all three of those layers together – you can’t just sew it all around the diameter and hope for the best. The fabric/layers would inevitably bunch up, get crooked, shift around, etc.
In order to secure the layers, you “quilt” them – which means sewing the three layers together over the entire surface area of the project. This can be done any way you like. You can do straight lines (which is currently my preference), or you can do a free form design/pattern. In other words: you get to be creative TWICE when making a quilt – first when you design the top layer with all the fabrics, and second when you choose the design/thread colors to “quilt” your layers together.
Quilting can be done by hand (a method chosen by very brave, talented, and patient people) or via a special “quilting foot” that attaches to your machine. For my straight-lined quilt, I just use the regular foot that came with the machine (only because the fabric/batting/backing are thin enough to allow for this. You just want to be careful that you don’t damage your machine by shoving too much under a “foot” that cannot accommodate the bulk – I learned this the hard way when I made my first quilt out of flannel.
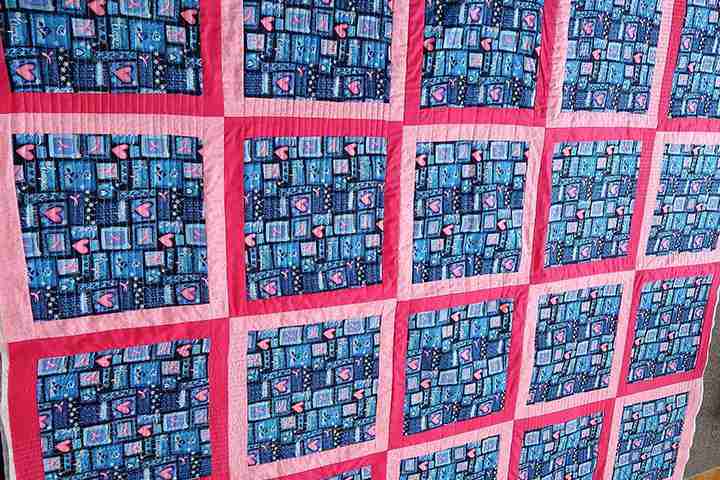
As you will see on the left hand side of the photo above (next to the pink ribbon), there are three evenly spaced straight pink seamlines. Those are the “quilting” lines that I am using over the surface area to secure my three layers together. Here’s a better view of a fully “quilted” square:

And so on and so forth. Just a couple tips I’ve learned after several quilts:
- “Quilt” in quadrants (from your quilt’s center to the outside corners). In other words, divide your quilt into four parts and “quilt” one quarter of it at a time from the innermost part to the outermost edge. This will prevent “bunching” because you will be able to keep your layers flat/smooth in smaller pieces – rather than “quilt” a line down or across the entire quilt at once. “Inside to the Out” makes it easier to maintain an ongoing “smoothing” process that you’ll want to have.
- Use quilt rings to make the process less cumbersome. The bigger the quilt, the heavier it becomes (you’d be surprised how heavy they can be), and be careful not to let the weight of the quilt pull at your needle (that could break it or damage your machine). The rings (as pictured above) will hold large portions of “rolled up” quilt in place and out of your way (including on the tray of your sewing machine).
- Make sure you overbuy on your thread, so you never have to worry that you won’t have enough. And you will use a LOT of thread to make a quilt.
- Take your time. If you’re getting tired and/or distracted, stop and pick up later or tomorrow. Tired + distracted = mistakes. However…
- Mistakes are OKAY. They happen. Quilts are pieces art made by people. I promise you there is not a single quilt in the history of the world that is 100% perfect (or at least I’m pretty sure of this). You’ll get a little bunch in your fabric (either on the front or back), you’ll need to sew up a tiny seam that came loose (thus adding some extra stitches), and not every line will be exactly equidistant or perfectly straight. But you have my word that your quilt will still be beautiful.
- Have fun. Take breaks. Play music. Take pictures. Show people. And don’t set deadlines for yourself – as I said before, it will get finished and be beautiful!
Stay tuned for one more post next week: Binding your quilt, and THE FINAL PRODUCT!!!